Monday, November 26, 2012

Karthigai Pori / Pori Urundai recipe / Mamra & Jaggery balls

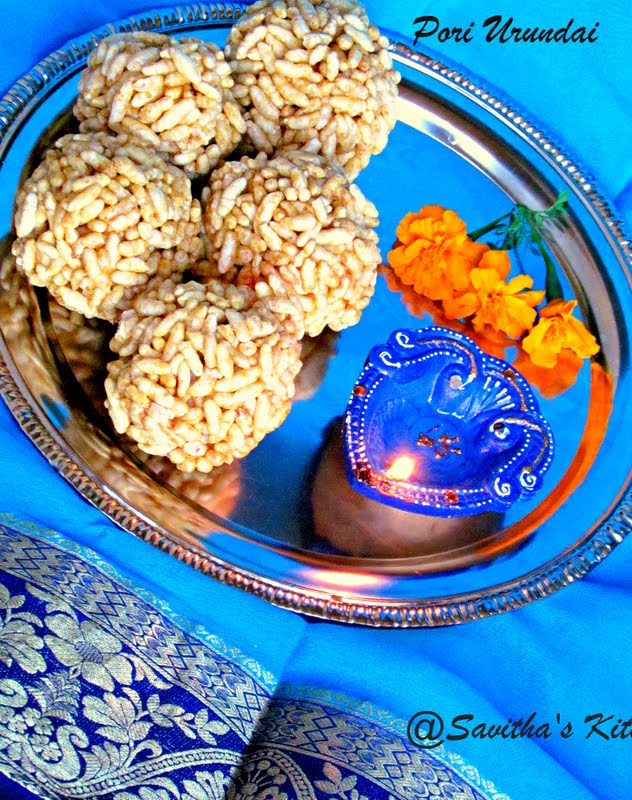
    I am wishing all my friends,fellow bloggers,Readers a very happy  "Karthigai Deepam".Its a festival of lights,where our homes are decorated with earthern lamps .My MIL used to prepare Karthigai Pori (Pori urundai) for neivedhyam.Pori urundai is prepared by adding pori to the jaggery syrup.Taking jaggery syrup is the key in making pori urundai.Practice makes the process very easy.We take the syrup as of adhirasam.After 2 failiures ,I got this pori urundai,a success.First time,my syrup went so hard,I couldn't make balls.Second time,It was watery ,my pori were flattened.But I tried it again ,with my MIL's advice.She asked me to prepare it in the ratio 1kg pori : 250 gm jaggery.Since its so much for my small family,used 4 cups : 3/4 cup ratio.It worked very well.Try it :)
 
 
Ingredients:
1.Pori or Mamra -  4 cups
2.Jaggery( powdered)  -   3/4 cup
3.Pottukadalai or fried bengal gram - 1 tbsp
4.Coconut pieces    -      1 tbsp
5.Water                   -       1/2 cup or as needed
6.Ghee                     -       2 tsp
 
Method:
*.Take a mixing bowl,add pori,pottukadalai,and keep it aside.
*.Take a pan and dry roast the coconut flakes finely.Keep it aside.After it is cooled,add it to the pori or mamra.
* Now take jaggery in a kadai or a pan.Don't take too heavy bottomed pan for taking syrup.Because it can withstand the heat ,and it may change the consistancy of the syrup quickly.So use a medium bottomed pan.
* Cover the jaggery with water and turn the stove to medium heat.
* When the jaggery is completley melted,take a strainer and strain the syrup for any impurities.
* Now bring the syrup to boil and turn the stove to medium low.Because from now on ,we can get the soft ball consistancy anytime .Take a cup of water to check the consistancy.
* The syrup will be foaming now.Take a spoon of syrup ,and pour it to  the water.When we touch the syrup,it should not dissappear in the water.It should be firm,and we take that in our hand,it should form a soft ball.This is the right consistancy.


* The other way to check the consistancy is ,when we drop the ball fastly,it should give a thud sound.
* Immediately turn off the stove and transfer the syrup to the pori mixture.If you are using electric stoves.then take the pan immediately from it and place some where else.As electric stoves have coil,which can withstand heat for long..Take a spoon and mix the jaggery well with the pori.Leave for 2 to 3 minutes not so long.
* Now grease your hands with ghee and start rolling the pori mixture into balls.We have to be very quick in making the balls,as the pori will become hard as time passes.
* Even after greasing your hand with ghee,if you feel that the pori sticks to your hands and not able to make it into balls.Then the other way to make the balls without sticking is,just wet your hands with water and try rolling the urundai.It will help.
*When the urundais are cooled ,store in air tight containers.


Sending this to Saras's Kitchen's "Dish in 30 minutes: sweets"


Reposting for event

Reposting this sweet for Dish in 30 minutes : Sweets event. Doodh Peda


Reposting this recipe for Saras's "Dish in 30 minutes: sweet" event .

Sunday, November 18, 2012

Baking Partners : A new Baking Group

A group of home bakers helping each other to achieve perfection.

  Baking a home made Baking a homemade bread, cake or cookies will give the best outcome. However in order to achieve the best results, a perfect recipe and right techniques are required.
  We are a small group of home baker friends, who love and want to learn more about the nook and corners of baking.  We are planning to try out recipes from books/magazines and cooking shows.  Every member gets a chance to present their choice of recipe and share important points with the rest of the group.
  Main purpose of this group is to learn the techniques, critic the procedure if there are ways to improve, and to eat a delicious food.
  Rules are simple, we will choose one recipe and send it out to the group by 16th of every month and the reveal date will be 15th of the next month. On that day we will blog about it. A linky tool will be open during that time and each member can link their post.
First month we are going to do a recipe, 2nd and 3rd month will be a theme and the 4th month we will be back at a recipe. By doing in between recipes, we will able to learn more.
  All enthusiastic bloggers interested in baking are welcome, please email Swathi  of Zesty South Indian Kitchen  at favoriterecipes12@gmail.com.
We will appreciate the use of logo or worded link that will help to spread the word.  A bunch of thanks to Tina for designing this beautiful logo


If you   want to make it a gluten or vegan free diet, you can do those modifications also.


  South Indian Kitchen) Creator and Owner

Monday, November 12, 2012

Sweet Somas / Kajjikayulu / Karanji /Gujjiya - Diwali special

                      I am wishing my readers,friends and relatives a very " Happy Diwali" .                 
      Somas or Kajjikayulu or Karanji is a very tasty sweet ,prepared during auspicious days .Like Seemandham, Kaadhukuthi etc.Mom used to prepare it for diwali.The crispier outer cover and the sweeter inside gives a divine taste.There are days ,where I would think that its a big process ,but when  I tried this recipe,it came out very well.Its easy too.Prepared this for Diwali. 


Yield: 25 somas
 
Ingredients:
For the outer cover:
1.All purpose flour / Maida      -        2 1/4 cups
2.Rava                                       -         2 tbsp
3.Ghee                                       -          2 tsp
4.Water                                      -          as required
5.Oil                                           -          for frying
 
 
For the filling:
1.Rava / Semolina                        -          1 cup
2.Shredded coconut                      -           1/4 cup
3.Cashews                                     -           8 to 10 pieces
4.Sugar                                          -           1 to 1 1/4 cup
5.Cardamom pwdr                         -           a pinch
 
Method:
Preparing the filling:
* Take a pan, dry roast the cashews,rava and coconut one by one.
* Chop the roasted cashews finely,after  cooling.
* Once rava,coconut,cashews are cooled,add sugar ,cardamom pwdr and mix it.
* I felt that the sugar is less, so have used 1 1/4 cup instead of 1 cup .But  you can use 1 cup of sugar also.Its upto your taste.
 
Preparing the somas:
* Take a mixing bowl,add maida,ghee   and mix it well.
* Now slowly add water and make it into a stiff yet soft dough.
* Pour a tsp of oil over the dough and rest it for half an hour,covered.
* Place t pan of oil and heat it.
* Now divide the dough into small balls.
* Slightly grease the dough with oil and roll it into a thin poori.
* Place the filling in one half of the poori. Slightly wet the edges of the poori and fold it.Seal it tightly.
* Now the fun part is,take a fork and press along the edges of the somas for a nice design.
* Now fry the somas in batches in hot oil.
* Flip it around and cook till the somas becomes golden brown.
* Remove it and strain the oil in a tissue.
* Store it in a air tight container.


Note:
* We can also use roasted gram dal pwdr instead of rava.
* Always cover the somas dough ,while preparing the somas.
* Prepare the somas in batches.Roll 2 or 3 somas,fry it and then roll the other somas in this way.


Friday, November 9, 2012

Kaara Boondhi /Spicy boondhi / Diwali special

        Boondhis are every one's favourite.We can prepare it in two ways,the spicy and the sweet boondhis.I have prepared spicy version .Spicy means " kaaram" in tamil.We used to prepare raita with boondhis .That will be yummy.I wanted to prepare ladoos for this diwali.As a warm up,prepared these boondhis .It came out perfect.The issue in preparing these boondhis will be their shape.A nice boondhi will not have  tails.When I prepared boondhis,I got tails for the first batch.So I did the spoon test,which helped me in getting rid of the tails.So prepare these easy boondhis for diwali.


Ingredients:
1.Besan flour                       -               1 cup
2.Rice flour                          -               1  to 2 tbsp
3.Peanuts                              -               1/2 cup
4.Garlic                                 -               4 pods
5.Curry leaves                       -                hand full
6.Chilli pwdr                         -                1 tbsp + 1 tsp
7.Salt                                     -                  to taste
8.Water                                  -                as  required


Method:
 * Measure the besan flour and sieve it well.
* Take a mixing bowl,add besan flour,little salt,little chilli pwdr,rice flour and mix it well.
* I have added 2 tbsp of rice flour,as I like my boondhis to be crispy.So you can add according to your preference.
* Add water little by little to form a bajji batter.
* I blended the batter with my hand blender.This made the batter lump free.
 
Spoon test:
 We can check the consistancy ,by touching the batter with the back of the spoon and dropping the batter in the oil.The boondhis will come out with perfect round shape.If  you get tails with the boondhis,then add some more flour to get round boondhis.
 
* Rest the batter for 10 - 20 mins.This will make the besan to ferment a bit,that will give more boondhis.
* Heat a pan of oil ,till it is hot,but not smoking hot.Check the temperature by dropping little batter in the oil,it should rise immediately without changing colour.
* Now take a laddle with holes ( Jalli karandi) ,pour the batter on the perforated laddle .Let the boondhis drop well.We can also tap the laddle to make the boondhis drop.
* After a minute,flip the boondhis to cook the other side.


* When the boondhis are crisp,remove it with a big strainer and place it on a tissue.
* Now take a small pan,add oil and fry the crushed garlic,peanuts,curry leaves,till they are crisp.
* Take a mixing bowl,add the fried boondhis,peanuts,curry leaves,crushed garlic,chilli pwdr,salt and toss it.
* Store in air tight containers.


Note:
* Adding crushed garlic will make the boondhi very flavourfull.
* When I prepared boondhis,got tails for 1 batches,then tried this spoon test,at last my boondhis were perfect.Spoon test is very useful to find the consistancy.So don't skip it.
* To make large batches of boondhis,big boondhi laddles are available in Indian stores.So use it to reduce your time.

Monday, November 5, 2012

A pictorial guide of making Sree krishna sweets style Mysore pa - / Diwali special /With Step wise pictures

            Who doesn't like mysore pa ? That too,if it is labeled under the most popular sweet shop ,"Sree krishna Sweets" in chennai ,then the number of mysore pa's entering your tummy will be countless.Thier mysore pas will be literally bathed in ghee.I tried this recipe several times and got the same consistancy every time.Already I would have posted this recipe,but with some variations.Like I have altered the ratio of ghee with some oil.But I couldn't take stepwise pictures ,as I was afraid there could be any chance for the mysore pa to go wrong,while I take pictures.But after become confident with the recipe,took pictures,with one hand, the other hand busily stirring the mysore pa.But I couldn;t take the last picture, though I was busy pouring it in the pan.The important tip here is ,keep the ghee always hot ,while pouring it.So here comes the stepwise pictures of making mysore pa - the Sree Krishna (guilty) way :)
 
 
Yield : 30 pieces
1 Cup : 160 ml 

Ingredients:
1.Besan flour                      -               1 cup
2.Sugar                               -                2 1/2 cup
3.Ghee                                -                2 1/2 cup
4.water                               -                 just to cover the sugar
5.Lemon yellow colour     -                 a pinch


Method:
                                         Measure the besan flour and sieve it without any lumps.This is very essential for getting a lump free mysore pa.

 
      Dry roast the besan flour, till it gives out nice aroma.It should turn into a light golden colour. We can also add few spoons of ghee to fry the besan.Its upto you.Always use a heavy bottomed pan like pressure cooker in preparing mysore pa.So ther will not be any chance for the mysore pa to stick to the pan. 
 
        Grese a square pan,with ghee all over.If you dont have a pan,just grease a plate with ghee.


  Take a heavy bottomed pan, add sugar and cover it with water.Bring it to boil ,for approximately 5 to 8 mins.Take it in your wet fingure,it should form a string.This is the 1 string onsistancy.To double check it,drop the syrup on a plate,it should be like a pearl,without moving.


                           Add lemon yellow colour to the syrup.and turn the stove to medium low.

     Now slowly add the fried besan flour to the syrup .One hand should be mixing the flour,and the other hand shoul be adding slowly.I know this is hard :).If you are not confident ,then just turn off the stove , add the flour,mix it completely without any lumps and turn on the stove.
Take a pan of water ,bring it to boil.Now place the ghee jar inside the pan.When the ghee is melted ,turn the stove to sim .This will keep the ghee warm ,so when we add to the mysore pa,it will  make it soft.
 
Mix the mysore pa,without leaving your hands.Add ghee cup by cup .Mix the mysore pa,till the ghee is engulfed in it. At one point of time, the mysore pa, will gather like that of a halwa.That is it will start leaving the sides.Confirm by taking in your wet fingure,and try to roll it,it will roll like a ball.This is the right consistany.Pour it in the greased pan.
 
When the mysore pa is still warm,slice it through a buttered knife and cut into squares.When it is cooled off completely,take it off and store in air tight containers.Keep it in cool dry place.If your kitchen is warm,better place it in the fridge ans serve them at room temperature.
 
You can also check the another mysore pa ,recipe with altering the ratio of ghee to be bit guilt free  here, .I always prefer usong home made ghee ,to get a aromatic mysore pa.Here is the link of making home made ghee.
 

Thursday, November 1, 2012

Basbousa ( An egyptian dessert ) / Simple Rava Cake(Eggless) with stepwise pictures - Diwali special

 Basbousa, when I first heared this name,it was quite different and I was laughing about the name. But when we prepared this cake,it tasted awsome.This is a egyptian rava cake. I first saw this recipe in my friend Sho's blog.Got curious about the name ,called her and enquired about the cake. She assured me that this a foolproof cake and would taste heavenly. The proess is bit lengthy,but the pain is worth for the taste.The ingredients are readily available in our pantry.The cake should be baked till golden brown.But I took it off pretty soon.Still it tasted yumelicious..... :) This cake will be a treat for diwali for the kids.


Ingredients:
1.Rava / Semolina          -            1 1/4 cup (250 gm)
2.Sugar                           -            3/4 cup     (150 gm)
3.Butter                          -             3/4 cup    (100 gm + 50 gm)
4.Coconut                       -             1/2 cup
5.Yogurt                          -            1/2 cup
6.Vanilla essence             -            few drops
7.Baking pwdr                 -             1 tsp
8.Almond                         -              a handfull

For the syrup:
1.Sugar                             -       3/4 cup  (150 gm)
2.Water                             -       1/2 cup (125 ml)
3.Lemon juice                   -          2 tsp

Method:
 Preparing the cake:
* Pre heat the oven for 350 degrees Farenhiet.
* Take a mixing bowl.add100 gm of   butter and melt it in a microwave for 1 minute.
* Cool it ,add rava,coconut,sugar,yogurt,baking powder,vanilla essence.I have used dessicated
coconut,but you can also use freshly grated coconut.

* Mix it with a spatula really well,without any lumps.
* Grease a pan and pour the mixture.
* Tap the pan,so the mixture is spread evenly.
* Make squares using a knife on the batter,not cutting fully.This step ensures us to have a properly cut cake .so dont skip this step.
* Bake it for 15 to 20 minutes.


* Now take the pan out from the oven and spread the remaining butter over the cake.
* Take almonds ,cut into two halves and press in on the squares .
* Bake it again for 10 -15 mins or untill the cake becomes golden brown.

 
Preparing the syrup:
* Take a bowl,add sugar and add water.
* Bring it to boil for 5 minutes or untill it is sticky.
* Add lemon juice,to stop the process of crystalisation.
* Turn off the heat and cool the syrup.
Once the cake is taken out of the oven,pour the syrup on top of the hot cake. Run through a knife on the cake fully and make the cuts deeper .Let the cake get soaked with the sugar syrup for 2 hours. Slice it enjoy the cake.

Notes:
* Make sure the cake is baked to golden brown .
* The syrup should be poured over the cake ,when the cake is hot.
* The yogurt has to be freshly made,and it should not be sour.
* If you dont have dessicated coconut,we can use freshly grated coconut.
* Since we have used coconut,its always best to finish within 1 week.
* We can also use raisins or any nuts,instead of using almonds.
* If the cake is not baked till golden brown,there are chances for the cake to beome soggy, when we pour the syrup.


You might also like

Related Posts Plugin for WordPress, Blogger...